Thursday, January 21, 2021

The Sacrifice Devlog 008: A Chat with Hadidjah, Implementing Feedback, Lighting, and Screenshake! (21/01/21)

Been a busy day, got a lot of stuff working and got some feedback on the project.

The other day, I had an hours talk with the very brilliant Hadidjah (Senior VFX Artist at Moonshot Games. Formerly VFX Lead on Hearthstone. @hadidjahb on Twitter), and among the things we discussed they were kind enough to provide me with some feedback on my piece!

First on the list was to swap the direction of the cultist fade to better math the flow of energy and keep the motion moving on one direction, and changing the colour a bit to better match the soul effect. Achieving this was just swapping the inputs on a subtract node, and changing the colour parameter but just those couple changes make a big difference in the overall effect.

Next up, making the portal rim energy more stylised. Hadidjah told me that the rim was creating a bit of a mismatch in style and that adding some more defined shapes to the texture may help stylise the effect a bit more. I took the texture I was using, added some spiky shapes and changed the overall contract of the image. After reimporting and playing with the tiling parameters a bit I found the rim looked far better.


Next, they suggested that I added something that could bridge the soul trail to the cultists a bit more, to create one cohesive effect as the souls travel to the portal. To do this, I reused my original trail shader but made it last longer and be more transparent. I found this to get the effect I wanted.

Finally, I altered my lightning texture a bit to add some more variance to the bolts. This was to make them a bit more interesting and add some secondary motion. All I really did was thin the bolts and move them about some more, then make the mesh wider to account, and it got the effect I wanted.


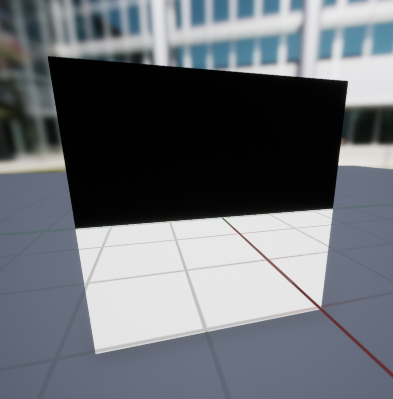
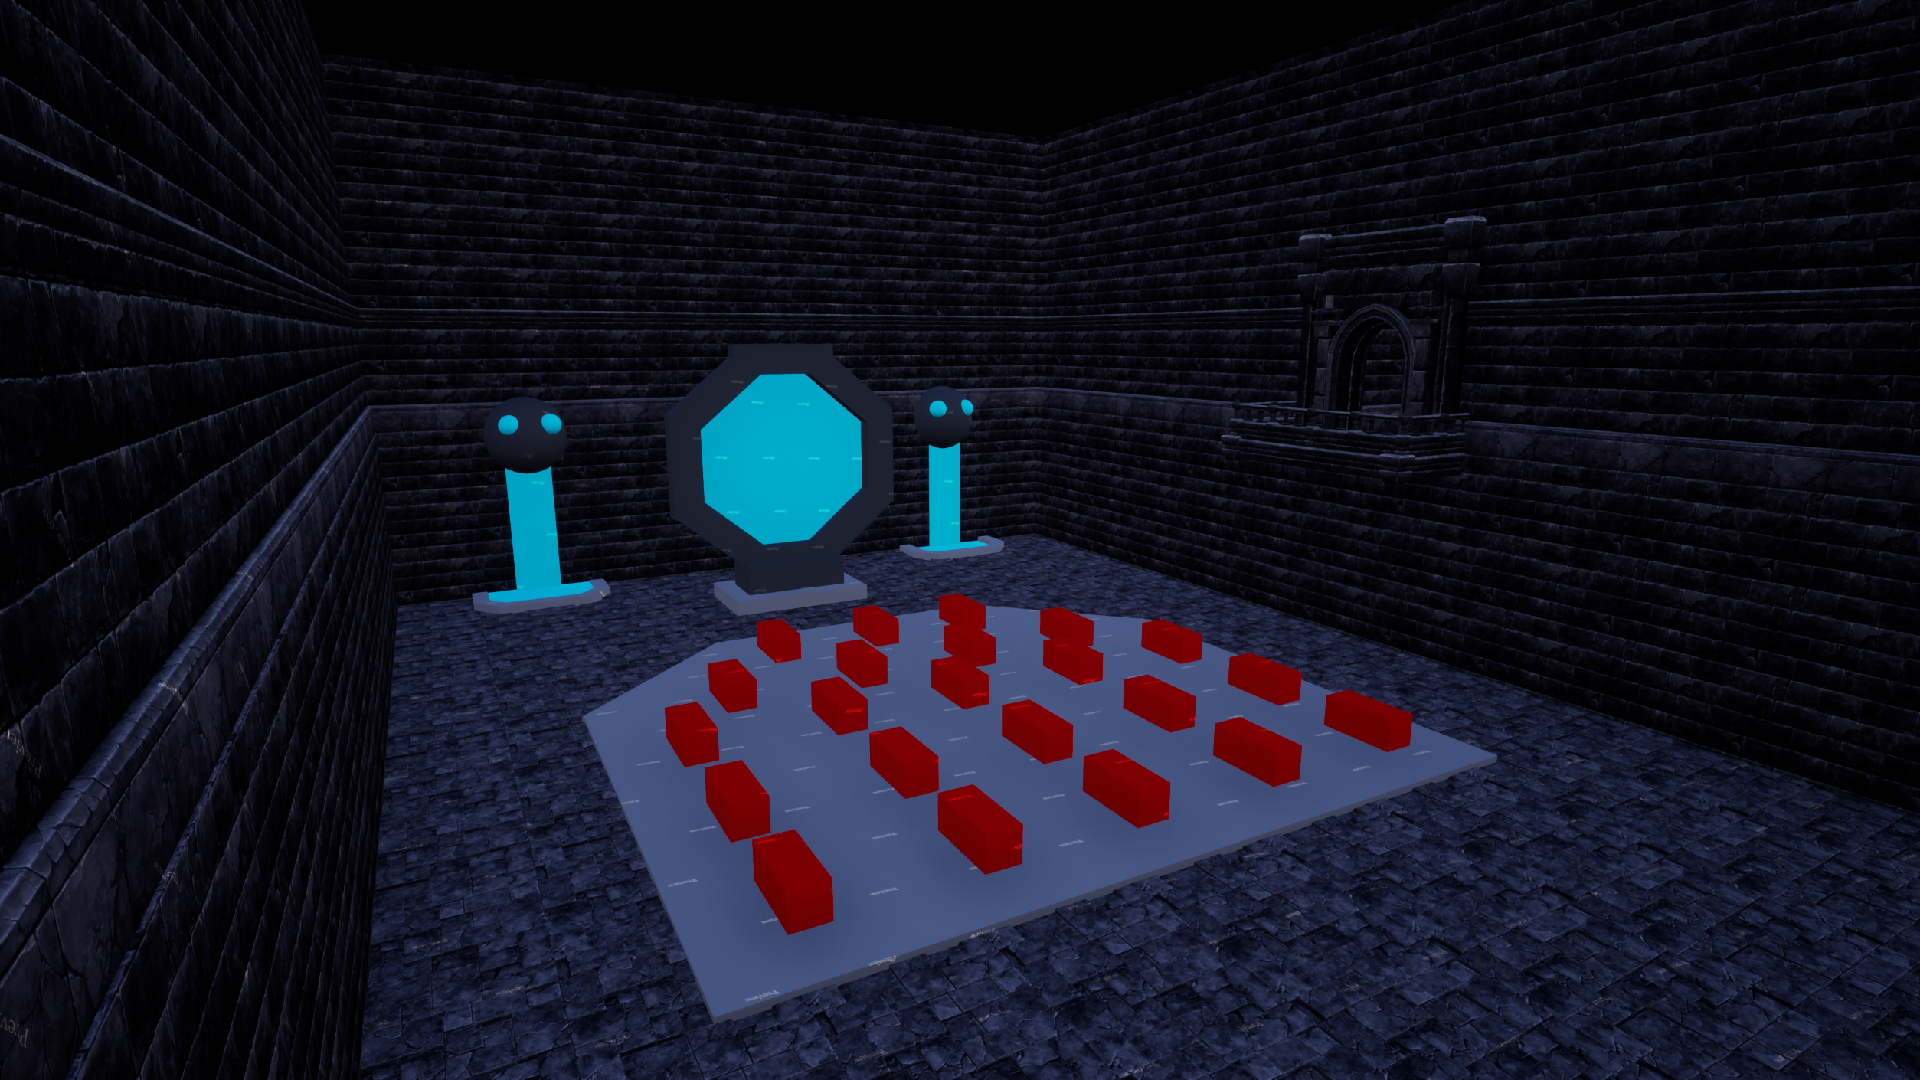
With the feedback implemented, I went to work on lighting the scene. I started out by just building what lights I already placed but as you can see, that didn't go too well.


Not ideal.

I then went about adding a load of point lights to my scene to give it a general bath of light. From there I added some blue lights to the portal area and after some tweaking, I managed to get scene to look kinda like it did before, only better. I also twiddled with the post processing a bit to get the scene more accurate to how I visioned it.


Right, lighting done, next up is my screenshake mechanic. I've been working on it for a few days but I got it working not long before me and Hadidjah talked, so i'm putting it here.

I always found that when looking at VFX online, and when looking at my references for the portal, that there was something missing from mine. After some head scratching an trial and error I realised loads of the effects I was looking at had some degree of screenshake, it didn't have to be much, but when it was there the effects seemed to feel far more impactful.

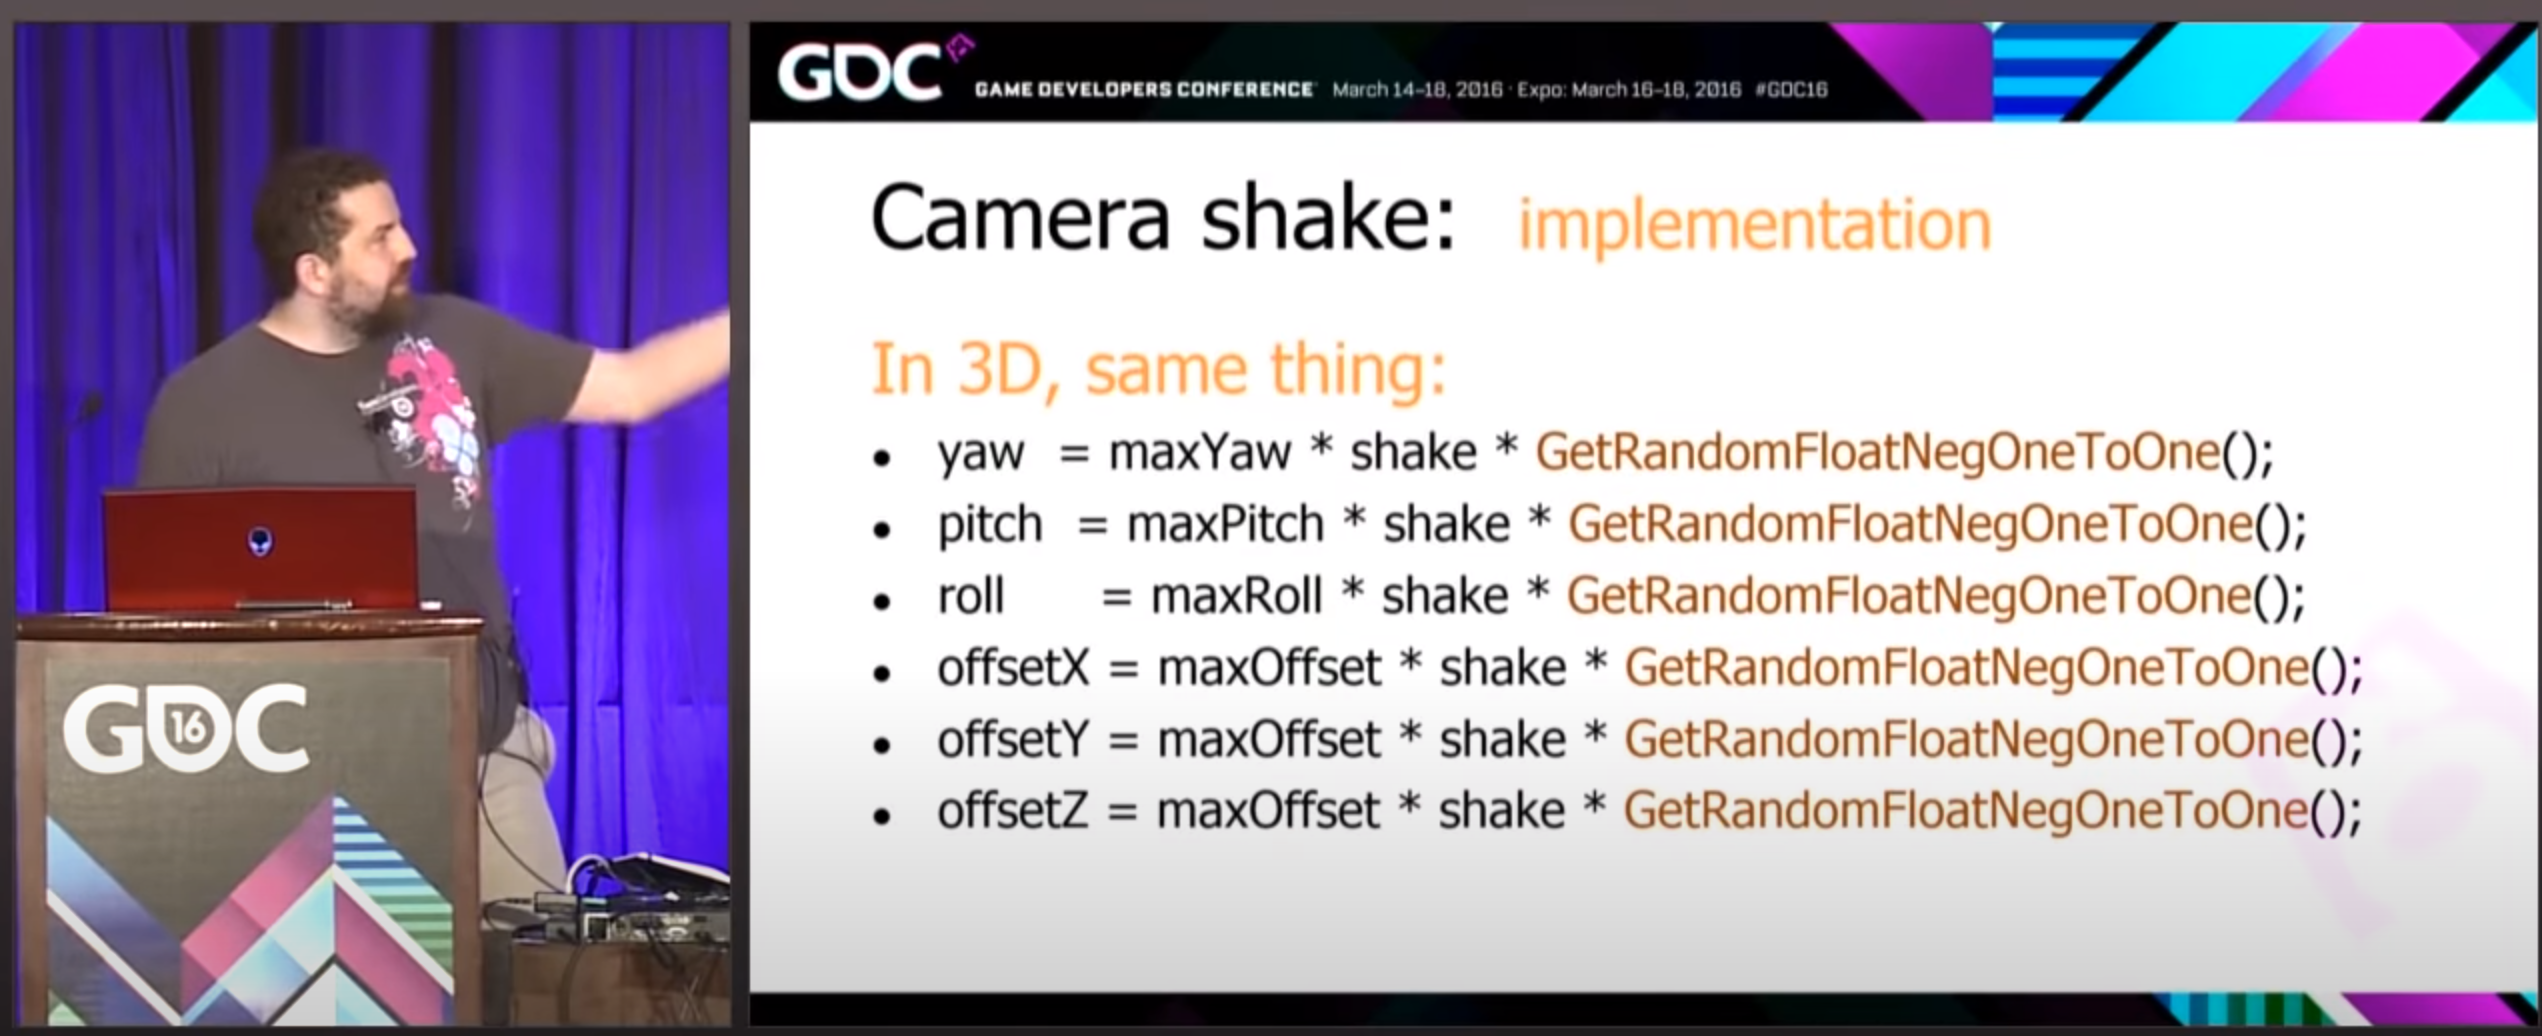
This realisation reminded me of a couple of talks I watched, called "The art of screenshake"

 and "Math for Game Programmers: Juicing Your Cameras With Math"

Both these talks go into how screenshake can add impact and punch to your game's feel, and so I went to implementing my own screenshake mechanic. Simply put, I took these equations from the Juicing Your Cameras video, and put them into blueprint.


From here, I added a couple functions and whatnot to allow my sequence manager to interact and shake the cameras, and boom! Screenshake!

With all of this put together, I'd say it's about done!

Wednesday, January 20, 2021

The Sacrifice Devlog 007: The Cultists (20/01/21)

The cultists are in and all vfx'ed up!

Here's the sequence as is:

So far in the scene I've just been using normal skeletal meshes however I've now set up a very basic animation blueprint that allows me to have them raise from a praying position, into a sort of worshiping pose. It's just a blend between the 2 animations, but I have them raise so fast it works well enough.

I timed the raising to happen as the portal snaps open, with each row slightly later than the last to make a wave motion, it's very quick but adds a bit more than having all the cultists raise at the same time.

With the mixamo animations set up, I started work on the soul effects. I broke the effect down into a few stages, being: initial poof, soul leaving, and the cultist body fading away.

For the first initial poof of energy I wanted a fast and impactful poof of energy to come from the cultists face, as to signal something is about to happen. I time this effect to happen on the next beat of the cultists raising wave so it feels consistent and like the next natural step in the sequence.

The next stage is the soul actually leaving the body and flying into the portal, spiraling through the air on its journey. To put together this effect, I looked back at my soul moodboard and went to work creating a texture for the head of the soul. I made the texture to taper off at the bottom so the head sort of fades into the trail forming one consistent soul.


After this, I went into substance designer and put together a trail texture using some built in noise and warp nodes. I then set up a material in engine that pans and tiles the texture, applies some alpha erosion on the end and then colours using a lerp node.


Beyond the materials, for the particle systems I set up the head of the soul to be velocity aligned and use a vortex force with a point attractor to pull the particles in a spiral towards the portal. The trail then just uses location events to follow the particles.

I also set up the blueprint that controls the whole sequence to delay the soul effect randomly for each cultist, as to prevent all the souls from leaving at once and feeling a bit static. I also had a problem where I'd get 2 souls spawning for each cultist, however I fixed that by extending the loop time of the emitter. Not sure why that fixed it, but it did so I'm not gonna complain.

Finally, I wanted the cultists to have their body sort of dissolve. To get this effect implemented a technique I saw be used as part of a fake volume of water shader, which allowed me to create a mask on a mesh in worldspace, as though it was being projected. The idea behind this is that you take the pixel location, subtract the object location, then subtract the object bounds. You can then multiply the object bounds a re-add the result, to control the amount of the mesh that's masked. In my case I went with a Z axis mask going down from the head of the cultist mesh.


From here I just applied some alpha erosion, smoothing, and coloring, and my cultists could now dissolve out of existence!

Sunday, January 17, 2021

The Sacrifice Devlog 006: Portal Opening Sequence and Sprucing (17/01/21)

Been while, had to do some vfx for a uni project but i'm back now. I've been chipping away at the project in bits here and there, putting together the portal opening sequence and ading some basic lighting.

Here's the portal as is:


When I was setting up this effect, I wanted to try and get the timing down and have the portal feel good and punch when it opens, so I tried a couple of tricks and I think they worked out. 

First off, I used a lot of curves to control the panning of my textures, and had the lightning frequency build up to the punch, starting slow then getting really quick at the end. I found having lots of elements building up and all culminating at the same point worked well to give the anticipation to the effect I wanted.

Heres the main punch of the sequence frame by frame:

The first thing I do is have the black hole bit (that at this point is a glowing mass of energy) scale up fast for a frame or so, to give a bit of anticipation. Then I spawn a mesh covering the hole of the frame, completely blacking it out, followed by blinding white on the next frame. The final frame of the transition I just spawn the portal. 

While it would have been possible to have the portal open by scaling the custom depth mesh, I felt having it be an instant in a flash felt a lot better.

Finally, I spawn some rim clouds to give a but more poof to the effect.

Once the portal is fully open, I spawn some dust particles and a small rim mesh to give a bit more of a sense of speed to the portal


On top of the portal, you might also notice I added some lights and better particles to the remnant pools. This is just preview lighting at the moment, but when I've got all my meshes and whatnot in the scene I'm gonna get to work on lighting properly.

I might also add a wibbly energy rim for a bit of secondary motion.

Monday, January 4, 2021

The Sacrifice Devlog 005: The Portal Shader (04/01/21)

Over the past couple days I've been putting together my portal shader. The idea behind this was to create a tunnel which opens up and seems to pass through anything behind it, which also allows stuff to pass into it and then not be visible when the portal closes.

Here what I ended up with for the main portal:

Obviously, it's got some work left to pretty it up a bit, but the main part of the shader is working.

For this post, i'm splitting the effect into 2 main parts, the portal shader, and the object function.

Portal Shader:

To achieve this effect I'm using 2 meshes, the tunnel, and a disc which is fitted to the opening of the tunnel.


In engine I put the 2 meshes into a blueprint with the disc aligned to the tunnel. I then set the disc to render to the custom depth buffer, while not being rendered in the main pass. 


What this allows me to do is, in the tunnel shader, compare scene depth to the custom depth buffer, and use the output to drive an opacity value. In essence if scene depth is more than custom depth, then the tunnel will be visible.


With this set up the next problem was that if the portal goes through any geometry, that geometry is visible. I fixed this with a bit of a cheat, but it does the job. I just make a duplicate of any materials I need, and set them to transparent, with a lower sort order priority than the portal.

And boom, portal shader halfway there!

Now, onto allowing stuff to get in it.

Object Function:

For objects going into the portal, I put together a material function that can be plugged into the opacity of any material, to allow it to interact with the portal.


The main part of the function is just running the same check as the portal tunnel, using custom depth to check if it should be visible or not. The key with this however is making an exception to this if the object isn't in the portal yet, otherwise the object would be invisible when it's not even close to the portal.

This turned out to be a relatively easy fix, all I had to do was set up a vector material parameter storing the location of the portal, and then check if the object is in front or behind the portal.


Now, currently i'm only checking the object position on one axis, meaning should the portal rotate it wouldn't work. If I was going to fix this I could probably do a bit of math and figure it out, but for my project I just don't need to.

Thursday, December 31, 2020

The Sacrifice Devlog 004: Custom Meshes (31/12/20)

For my sequence to work, I required some custom meshes that I won't get out of any asset packs, such as the center floor piece. This is because, for example, I need the UVs to be laid out in a specific way for my remnant shader to flow in the right direction. 

Here's my environment, with some custom meshes added:

As you can see I've now got the center piece, back pools, and gargoyles in the scene. The gargoyles came from another asset pack called 'Medieval Dungeon' on the UE4 marketplace (Marketplace Link), however I did use some of the new 4.26 meshing tools to make the models better fit my needs.

As for the center piece and pools, I went into Max and threw together the meshes i'd need, and unwrapped them using the trimsheet included in one of the asset packs I'm using. I then added the parts of the mesh that would be using the remnant shader, and unwrapped them to allow the flow and mask direction to work as I planned.


To finish, I got the models exported and into my scene, with the right materials applied.

Now, a problem I had was that where the remnant falls into the pools, there was no transition. To fix this, I used a trick in this video, showing how waterfalls can be made: GAT #65: Stylized VFX in RIME (Jump to 36:22 for the part i'm referencing)

From this, I put together a shader which deforms a plane and makes a nicer transition for the falling remnant. I'm aware that it doesn't at all look like a splash, but I'm imaging the remnant to be kinda thick and not splashing around much.

In addition to the transition bit, I also added the option to use a polar coordinated conversion on the texture which drives the displacements, meaning the pools now have ripples from the center.


With all this done, I'm moving onto my portal shader next. On that note, as you can see below, I got a portal mesh from the marketplace too. Dark Portal Marketplace Link

Current progress:


Monday, December 21, 2020

The Sacrifice Devlog 003: Yummy Soul Juice (21/12/20)

Okay, I couldn't help it... I had to put together my remnant shader.

Embracing the theme of The Dark Arts, my sequence is going to heavily feature the idea of souls being taken as sacrifice. One of the ideas I had for this, was to show the main portal being powered by some sort of soul juice, which I've taken to calling remnant (Totally not like the FNAF remnant, not at all...).

So far, I've been working on the main remnant material, in future I'm going to have the remnant flow through channels in the floor and up into the portal frame, but for now I'm just getting the main material put together.

Here's the finished material:


When making the material, I wanted to create something that had the appearance of a liquid, but wasn't like anything you'd find on Earth. I based it on a texture I remembered from the Harry Potter and the Chamber of Secrets PC game, which I used to play as a kid.


I tried to capture the same feeling I got as a kid, seeing that texture for the first time, in my material.

For the material itself, I just use a bit of UV distortion on a texture I made. I then layer this with another texture (in this case, the same one, offset by .5 on the UVs), however this second layer is being offset by a BumpOffset node to give a bit of parallax for some added depth.


I then take the output of all this and use it to drive a lerp node, with my primary and secondary colours as parameters. In future I might use a gradient map to give colour, but for now I want the flexibility of having a couple of parameters, at least until I get the colours nailed down in engine.

The next step was adding a mask that would allow me to animate the shader flowing through channels in the floor and portal. For the mask, I just take the V channel from a texture coordinate node and subtract a paramter from it, followed by a ceil. Also threw in a couple oneminus nodes to make it all work properly, goes funny if they aren't there.

Graph -


Result -

(Mask is set to 0.5)

With the mask in place I'm able to animate the remnant flowing just as I wanted, provided the UVs of the mesh are laid out correctly (Flow and mask direction is upwards).


From all this I just added a panner, some scaling controls, a fresnel node, and called it done.

Full node graph: 

UPDATE (22/12/20)

Since making the material, I noticed that when being used on a flat place it just looks a bit static, so I went ahead and added some controls for tesselation and displacement to give it a nice ripple effect.


The ripple is just driven by a noise texture panning up currently.


The Sacrifice Devlog 002: Blockout and First Meshes (21/12/20)


Before working on any VFX, I wanted to set the scene a bit and get a better idea of what I'd be able to do in the space I was creating. To start, I threw together a quick blockout based on my initial sketches, I then went over this with some meshes for the basic geometry.

For the meshes, I'm using an asset pack from the UE4 marketplace called Multistory Dungeons (Marketplace Link). I've used this pack before in my mana fire effect, and working on that is what inspired me to go with this project, so it made the most sense to go with the same pack.

I had to make a couple of adjustments to the textures inside Unreal to get the colours right, but other than that the first pass went together just fine. I need to source gargoyle model at some point, as the pack I'm using doesn't come with one. For the centre floor piece, I'm going to be modelling it myself and using the trimsheet from the pack. As for the portal, I'm not sure at this point if I'm going to source a portal model and modify it to fit my needs, or if I'm going to make it all myself.

The Sacrifice Devlog 001: Starting the Project (18/12/20)

First post time bay-bee!

Really glad to get working on this project, been bogged down with uni work until now but now i'm free to go ham with this. For my project, I'm going to be creating a VFX sequence, making use of lots of particles and shader work.

So far I've got a rough outline of my ideas down into a design document, which is available here: Google Doc
Before I got all bogged with uni work, I worked on a little blue fire particle system, and since creating that I've been wanting to take it further and use the setting for a full effects sequence, so it seems perfect for this project. For reference, here's the effect I'm talking about: Mana Fire VFX (Don't worry, for this project I'm working in a new UE4 project and not using any of my old stuff)

When I first came up with the idea for my sequence I threw it all down into my pad, it's not much to look at and is probably hard to read given how I was scribbling it down, but it's there to remind me of any little details I came up with originally.
My sequence is going to feature a group of cultists sacrificing themselves, and their souls, to a massive portal in some underground dungeon. I'm going with this because it's gonna allow me to work on a variety of effects, and push my shader skills when it comes to making the portal.