Embracing the theme of The Dark Arts, my sequence is going to heavily feature the idea of souls being taken as sacrifice. One of the ideas I had for this, was to show the main portal being powered by some sort of soul juice, which I've taken to calling remnant (Totally not like the FNAF remnant, not at all...).
So far, I've been working on the main remnant material, in future I'm going to have the remnant flow through channels in the floor and up into the portal frame, but for now I'm just getting the main material put together.
Here's the finished material:
When making the material, I wanted to create something that had the appearance of a liquid, but wasn't like anything you'd find on Earth. I based it on a texture I remembered from the Harry Potter and the Chamber of Secrets PC game, which I used to play as a kid.
I tried to capture the same feeling I got as a kid, seeing that texture for the first time, in my material.
For the material itself, I just use a bit of UV distortion on a texture I made. I then layer this with another texture (in this case, the same one, offset by .5 on the UVs), however this second layer is being offset by a BumpOffset node to give a bit of parallax for some added depth.
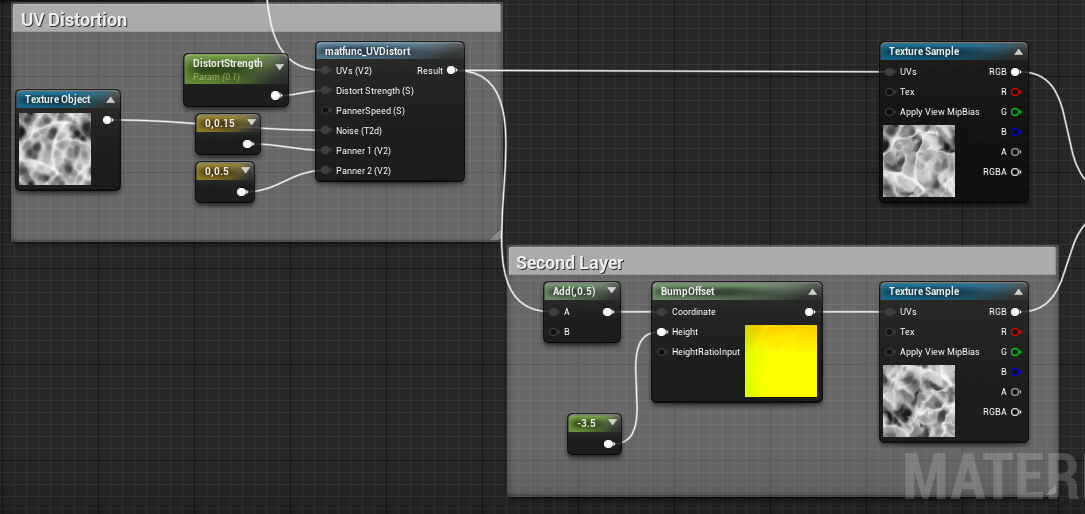
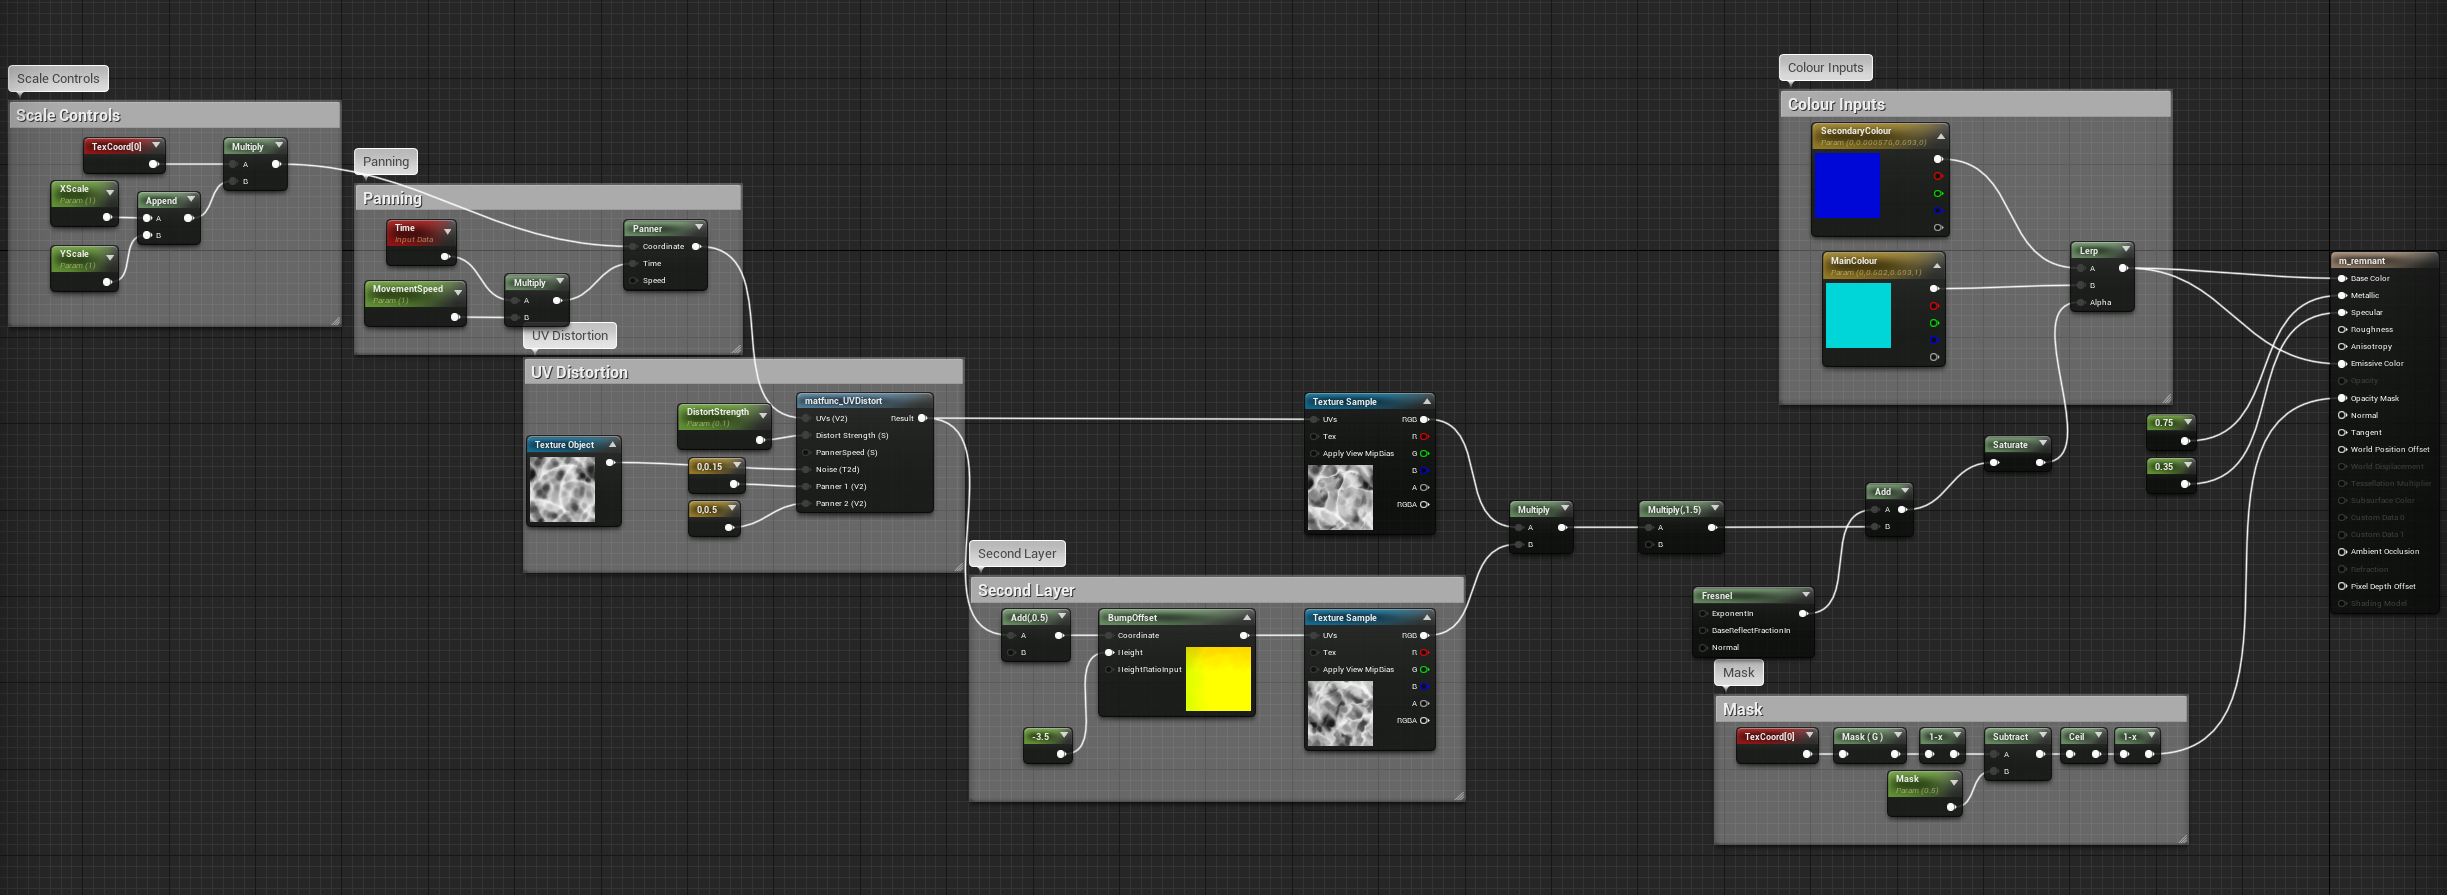
I then take the output of all this and use it to drive a lerp node, with my primary and secondary colours as parameters. In future I might use a gradient map to give colour, but for now I want the flexibility of having a couple of parameters, at least until I get the colours nailed down in engine.
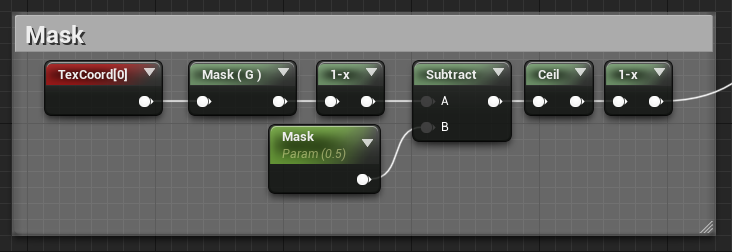
The next step was adding a mask that would allow me to animate the shader flowing through channels in the floor and portal. For the mask, I just take the V channel from a texture coordinate node and subtract a paramter from it, followed by a ceil. Also threw in a couple oneminus nodes to make it all work properly, goes funny if they aren't there.
Graph -
Result -
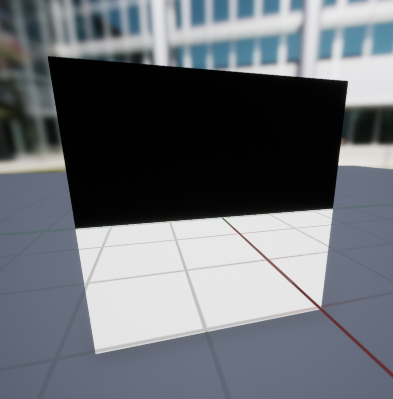
(Mask is set to 0.5)
With the mask in place I'm able to animate the remnant flowing just as I wanted, provided the UVs of the mesh are laid out correctly (Flow and mask direction is upwards).
From all this I just added a panner, some scaling controls, a fresnel node, and called it done.
Full node graph:
UPDATE (22/12/20)
Since making the material, I noticed that when being used on a flat place it just looks a bit static, so I went ahead and added some controls for tesselation and displacement to give it a nice ripple effect.
The ripple is just driven by a noise texture panning up currently.

No comments:
Post a Comment